

In the current digital age, online security is more important than ever. Websites and applications must protect themselves from automated attacks and malicious behavior, while maintaining a smooth and welcoming user experience. Google reCAPTCHA v3 emerges as a powerful solution, offering a solid defense without disrupting user interaction. For Angular developers looking to implement this technology without relying on external libraries or packages, this step-by-step guide offers a solution.
Table of Contents
Why reCAPTCHA v3?
Google reCAPTCHA v3 stands out for its ability to operate in the background, evaluating user actions to determine the likelihood that they are human, without requiring interactions such as selecting images or entering text. This approach minimizes disruption, enhancing the user experience while protecting the site from automated abuse.
Prerequisites
Assuming that the Angular project is already set up with the basic configuration, no further modifications to the environment are needed.
API Keys Registration
The first step to integrate reCAPTCHA v3 into your Angular project is to obtain the necessary API keys. By visiting the Google reCAPTCHA website, you can register your site and receive a site key and a secret key, essential for the integration.
1. Create a Google account or sign in with your account. Open the Google reCAPTCHA site and click on the v3 Admin Console link at the top.

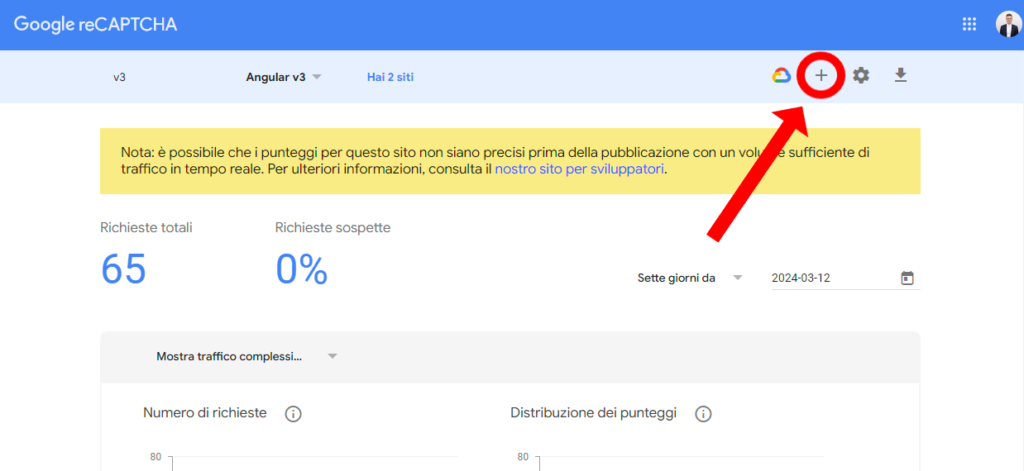
2. Once logged in, you will be presented with an initially empty dashboard. To add a new site and generate the keys you need, click on the + button.
3. You will be directed to the page for the Enterprise version of reCAPTCHA, but in this guide, I will create a “classic” key, though the process is almost the same. Proceed by clicking on “Switch to create a classic key,” then fill in the field for Label, select the radio button for reCAPTCHA v3, fill in the field for Domains, click on the checkbox to accept the reCAPTCHA Terms of Service, and click on the Submit button.
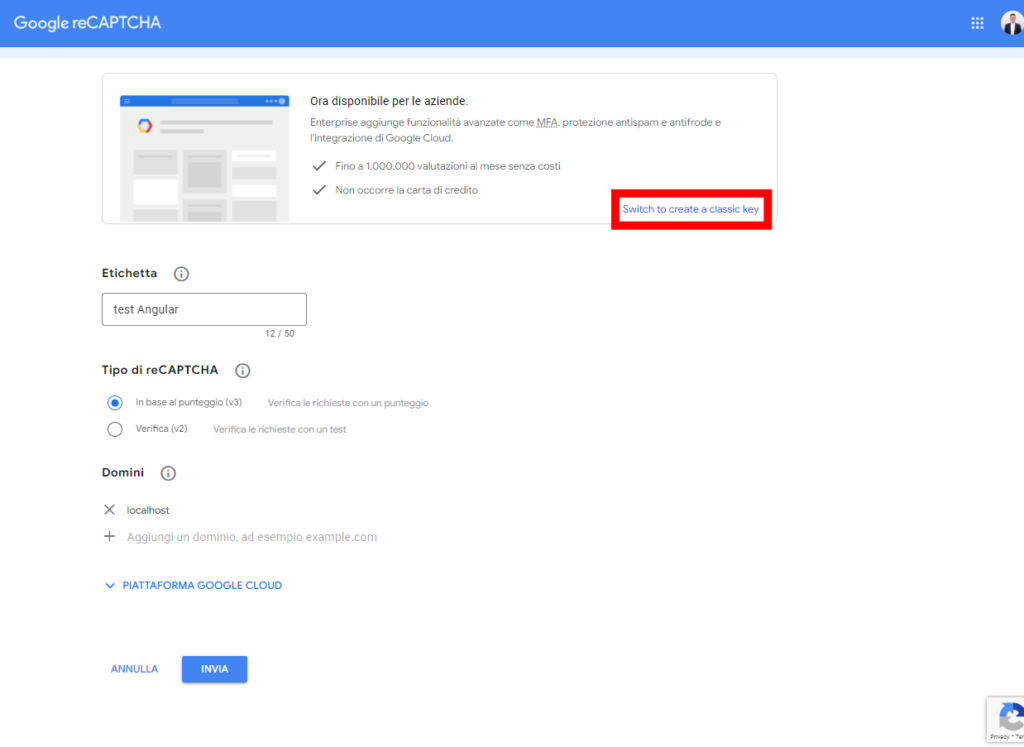

NOTE: In this example, I used ‘localhost’ for testing the reCAPTCHA without the need to deploy the app online.
4. Click on the button COPY SITE KEY to copy the key; this will be useful in the Angular app. The secret key, on the other hand, will be useful to the backend to subsequently verify whether the action taken is legitimate or malicious.
Angular implementation
1. Configure the siteKey variable with the Google reCAPTCHA key in the src/environments/environment.ts and src/environments/environment.prod.ts files as below.
recaptcha: {
    siteKey: '6Lf7UL0cAA***********************'
},
2. Add in app.component.ts the script for the recaptcha.
import { Component } from "@angular/core";
import {environment} from "../environments/environment";

@Component({
  selector: "app-root",
  templateUrl: "./app.component.html",
  styleUrls: ["./app.component.scss"],
})

export class AppComponent implements OnInit {
  constructor() {}

  ngOnInit(): void {
    this.loadRecaptchaScript();
  }

  loadRecaptchaScript() {
    const script = document.createElement("script");
    script.src = `https://www.google.com/recaptcha/api.js?render=${environment.recaptcha.siteKey}`;
    document.head.appendChild(script);
  }
}
NOTE: Alternatively, you can simply add the script
<script src=”https://www.google.com/recaptcha/api.js?render=your_siteKey”></script>
directly in the <HEAD> of index.html. In this case, it will no longer be necessary to declare the variable in Environment, but your code will be hardcoded.
3. Now, all that remains is to implement the action you want to verify with reCAPTCHA, such as a submit button for a form. In the following example a button will trigger the reCAPTCHA.
app.component.html or wherever you want
<button type="submit" aria-label="protected action" (click)="protectedAction()"> Submit </button>
app.component.ts or or wherever you want
  protectedAction() {
    grecaptcha.ready(() => {
      grecaptcha
        .execute(environment.recaptcha.siteKey, { action: "recoveryPassword" })
        .then((token: string) => {
          /*Here, your service sends the token and other information to the backend and waits for the response.*/
        });
    });
  }
To use the grecaptcha variable in Angular so that TypeScript does not report errors for using an undefined variable, you might need to declare grecaptcha as a global variable in your component or service that handles the reCAPTCHA. This informs TypeScript that grecaptcha exists in the global context. You can do this by adding the following declaration at the beginning of your TypeScript file where you will implement the use of reCAPTCHA, outside of the component class:
declare var grecaptcha: any;4. Once you call the backend endpoint, your work is done. Now, the backend will call a Google endpoint to verify the user’s behavior and will send errors to the frontend if something goes wrong. Make sure to handle them.
5. Ready! Access the URL http://localhost:4200/ and check if the application is working.